1. Spring-Boot-AutoConfigure vs Spring-Boot-Starter
- XXX-Spring-Boot-Autoconfigure 모듈 : 자동 설정
- XXX-Spring-Boot-Starter 모듈 : 필요한 의존성 정의(pom.xml이 중요)
하나로 만들고 싶으면 Starter로 만들면 됨
2. pom.xml에 의존성 추가 (Project A)
    <dependencies>
        <dependency>
            <groupId>org.springframework.boot</groupId>
            <artifactId>spring-boot-autoconfigure</artifactId>
        </dependency>
        <dependency>
            <groupId>org.springframework.boot</groupId>
            <artifactId>spring-boot-autoconfigure-processor</artifactId>
            <optional>true</optional>
        </dependency>
        <dependency>
            <groupId>org.springframework.boot</groupId>
            <artifactId>spring-boot-configuration-processor</artifactId>
            <optional>true</optional>
        </dependency>
    </dependencies>
3. Human class (Project A)
public class Human {

   String name;
   int age;

   public String getName() {
      return name;
   }

   public void setName(String name) {
      this.name = name;
   }

   public int getAge() {
      return age;
   }

   public void setAge(int age) {
      this.age = age;
   }

   @Override
   public String toString() {
      return "Human{" +
         "name='" + name + '\'' +
         ", age=" + age +
         '}';
   }
}
4. HumanConfiguration class (Project A)
Human을 자동 설정해주는 설정파일
보통은 설정 대상이 되는 Human은 다른 프로젝트에 위치
@Configuration
public class HumanConfiguration {

   @Bean
   public Human human() {
      Human human = new Human();
      human.setAge(29);
      human.setName("hhlin");

      return human;
   }
}
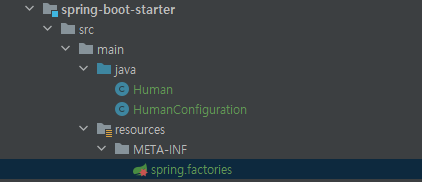
5. META-INF directory 생성 및 spring.factories 파일 만들기 (Project A)
6. spring.factories에 자동 설정 파일 추가 (Project A)
@EnableAutoConfiguration이 켜져 있으면 spring.factories 파일을 참조해
HumanConfiguration에 있는 Bean 설정을 보고 사용하게 됨
org.springframework.boot.autoconfigure.EnableAutoConfiguration=\
  HumanConfiguration
7. mvn install (Project A)
프로젝트를 빌드하고, 다른 프로젝트에서 사용할 수 있도록 maven install을 더블 클릭하거나
콘솔에 mvn install 입력 -> jar 파일 생성됨
: 이 프로젝트를 빌드를 해서 jar 파일 생성된 걸 다른 maven 프로젝트에서 가져다 쓸 수 있도록 로컬 maven 저장소에 설치함

8. pom.xml에 의존성 추가 (Project B)
Project A의 pom.xml에 있던 값으로 Project B에 의존성 추가
        <dependency>
            <groupId>kvp.hyelin</groupId>
            <artifactId>spring-boot-starter</artifactId>
            <version>0.0.1-SNAPSHOT</version>
            <scope>compile</scope>
        </dependency>
9. HumanRunner class (Project B)
Human Bean이 있는지 확인하기 위한 객체
@Component
public class HumanRunner implements ApplicationRunner {

	@Autowired
	Human human;

	@Override
	public void run(ApplicationArguments args) throws Exception {
		System.out.println(human);
	}
}
Project B에서는 Human을 Bean으로 등록하지 않았지만 그냥 가져다 쓰고 있음
# 실행 결과
: kvp.hyelin.starter.Human{name='hhlin', age=29}
# 주의
아래와 같이 명시적으로 Bean을 선언해주고 실행했을 때, 기대값은 test, 222이지만
HumanConfiguration에 선언했던 hhlin, 29이 나옴
@SpringBootApplication
public class Application {

	public static void main(String[] args) {
		SpringApplication application = new SpringApplication(Application.class);
		application.setWebApplicationType(WebApplicationType.NONE);
		application.run(args);
	}

	@Bean
	public Human human() {
		Human human = new Human();
		human.setName("test");
		human.setAge(222);

		return human;
	}
}
Spring Boot에서 Bean을 등록할 때
ComponentScan으로 Bean을 등록하는 게 먼저이기 때문에, 위에 Application class에 명시한 Bean이 먼저 등록됨
그 다음으로 AutoConfiguration으로 Bean을 등록하는 과정에서 HumanConfiguration에 선언된 Bean으로 덮어써짐
# 실행 결과
: kvp.hyelin.starter.Human{name='hhlin', age=29}
10. @ConditionalOnMissingBean (Project A)
해당 타입의 Bean이 없을 때만 등록하게 해줌
@ComponentScan으로 명시된 Bean들이 무조건 우선시되어야 하기 때문에
Project A의 HumanConfiguration에 선언된 Bean에 @ConditionalOnMissingBean을 추가함
(Project A maven install하고 jar파일 다시 가져와야 함)
@Configuration
public class HumanConfiguration {

   @Bean
   @ConditionalOnMissingBean
   public Human human() {
      Human human = new Human();
      human.setAge(29);
      human.setName("hhlin");

      return human;
   }
}
# 참고
Human 객체에 값 2개만 바꿀건데 굳이 Bean으로 만드는 번거로운 작업을 하지 않으려면
① src/main/resources/application.properties (Project B)
human.name = "test11"
human.age = 123
② HumanProperties class 생성 (Project A)
@ConfigurationProperties("PREFIX") 어노테이션 추가 (위에 application.properties에 적어준 이름과 동일해야 함)
@ConfigurationProperties("human")
public class HumanProperties {

   private String name;
   private int age;

   public String getName() {
      return name;
   }

   public void setName(String name) {
      this.name = name;
   }

   public int getAge() {
      return age;
   }

   public void setAge(int age) {
      this.age = age;
   }

}
③ Property에 대한 자동완성 기능을 사용하기 위해서는 아래 의존성이 추가되어야 함 (Project A)
<dependency>
    <groupId>org.springframework.boot</groupId>
    <artifactId>spring-boot-configuration-processor</artifactId>
    <optional>true</optional>
</dependency>
④ HumanConfiguration class 수정 (Project A)
@EnableConfigurationProperties(HumanProperties.class)을 추가하고 properties에 있는 name, age로 세팅
@Configuration
@EnableConfigurationProperties(HumanProperties.class)
public class HumanConfiguration {

	@Bean
	@ConditionalOnMissingBean
	public Human human(HumanProperties properties) {
		Human human = new Human();
		human.setName(properties.getName());
		human.setAge(properties.getAge());

		return human;
	}
}
Project B에 명시된 Bean이 없다면, Project A에서 AutoConfiguration에 의해 Bean이 생성될 거고
해당 Bean은 HumanProperties를 참조해서 name, age 값을 가져오는데
HumanProperties에 @ConfigurationProperties 어노테이션 PREFIX값으로 "human"을 줬기 때문에
applicatoin.properties 파일에서 human.name과, human.age를 읽어서 test11, 123을 가져옴
# 실행 결과
: kvp.hyelin.starter.Human{name='test11', age=123}
https://www.inflearn.com/course/%EC%8A%A4%ED%94%84%EB%A7%81%EB%B6%80%ED%8A%B8/dashboard
스프링 부트 개념과 활용 - 인프런 | 강의
스프링 부트의 원리 및 여러 기능을 코딩을 통해 쉽게 이해하고 보다 적극적으로 사용할 수 있는 방법을 학습합니다., - 강의 소개 | 인프런...
www.inflearn.com
'Java > Spring Boot' 카테고리의 다른 글
| [Spring Boot] 내장 웹 서버 응용 - 다른 웹 서버 사용하기 / 웹 서버 사용하지 않기 / 포트 변경하기 (0) | 2022.03.05 |
|---|---|
| [Spring Boot] 내장 웹 서버 (0) | 2022.03.05 |
| [Spring Boot] 자동 설정 (Auto Configuration) (0) | 2022.02.26 |
| [maven] 의존성 찾기 (0) | 2022.02.26 |
| [Spring Boot] 의존성 관리 (0) | 2022.02.26 |


