[Spring Boot] Test
1. spring-boot-starter-test
Test를 위해서는 pom.xml 내에 spring-boot-starter-test 의존성 추가 필수
-> test scope으로 추가
<dependency>
    <groupId>org.springframework.boot</groupId>
    <artifactId>spring-boot-starter-test</artifactId>
    <scope>test</scope>
</dependency>
2. 가장 기본적인 형태의 Test code
import org.junit.runner.RunWith;
import org.springframework.boot.test.context.SpringBootTest;
import org.springframework.test.context.junit4.SpringRunner;

@RunWith(SpringRunner.class)
@SpringBootTest
public class SampleControllerTest {

}
3. @SpringBootTest -> 통합 테스트
- RunWith(SpringRunner.class)랑 같이 써야 함
- Bean 설정 파일은 알아서 찾음 (@SpringBootApplication)
@SpringBootTest가 @SpringBootApplication을 찾아가서,
@SpringBootApplication부터 시작해서 모든 Bean을 스캔해서
Test용 ApplicationContext를 만들때, Bean으로 등록함
(그 다음으로 @MockBean을 찾아서 해당 Bean만 Mock으로 만든 객체로 교체) - webEnvironment
- MOCK (mock servlet environment) : 내장 톰캣 구동 안 함
- RANDOM_PORT, DEFINED_PORT : 내장 톰캣 사용
- NONE : 서블릿 환경 제공 안 함
4. WebEnvironment.MOCK
: MockMvc Client를 사용해야 함
@RunWith(SpringRunner.class)
@SpringBootTest(webEnvironment = SpringBootTest.WebEnvironment.MOCK)
@AutoConfigureMockMvc
public class SampleControllerTest {

   @Autowired
   MockMvc mockMvc;

}
-> MockMvc를 만드는 다양한 방법 중 가장 쉬운 방법
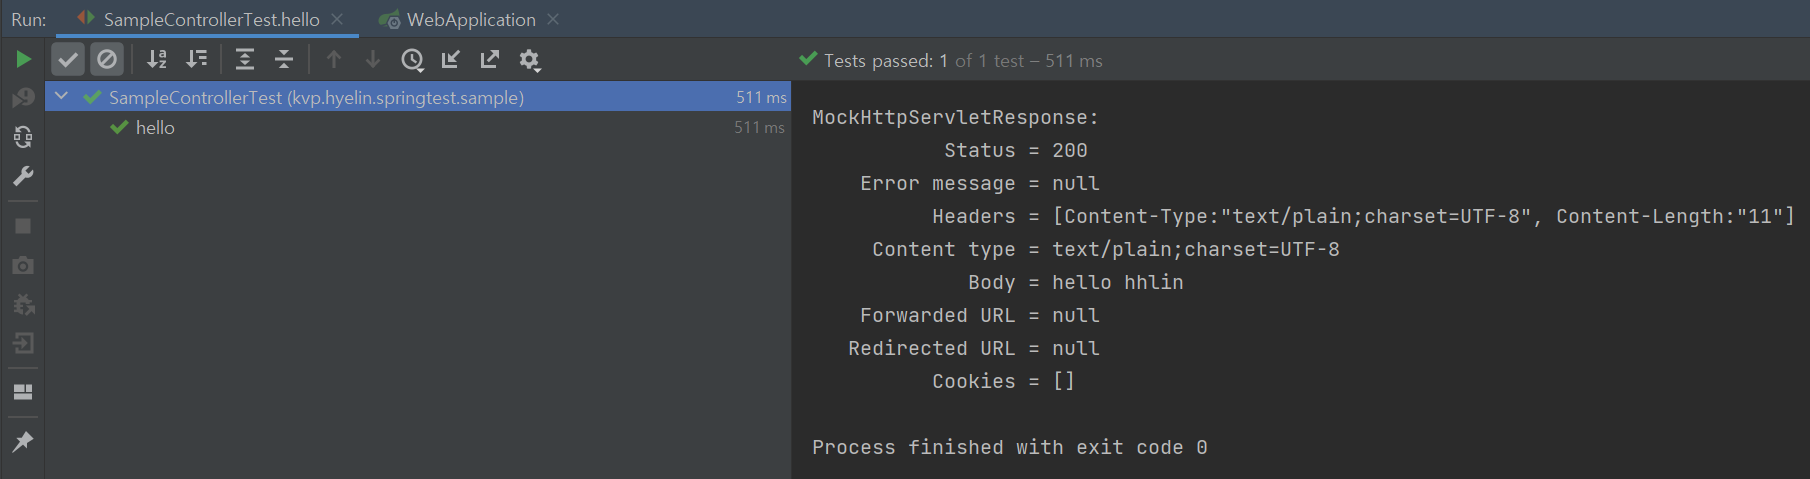
@Test
public void hello() throws Exception {
   mockMvc.perform(get("/hello"))
      .andExpect(status().isOk())
      .andExpect(content().string("hello hhlin"))
      .andDo(print());
}
5. WebEnvironment.RANDOM_PORT
: 내장 톰캣이 뜸. MockMvc가 아니라 TestRestTemplate이나, WebTestClient를 사용해야 함
@RunWith(SpringRunner.class)
@SpringBootTest(webEnvironment = SpringBootTest.WebEnvironment.RANDOM_PORT)
public class SampleControllerTest {

   @Autowired
   TestRestTemplate testRestTemplate;

   @Test
   public void hello() throws Exception {
      String result = testRestTemplate.getForObject("/hello", String.class);
      assertThat(result).isEqualTo("hello hhlin");
   }
}
-> 내장 톰캣 서버에 요청을 보내고 응답을 받아서 확인을 한 것
DEFINED_PORT 사용 시 정의한 포트를 사용 가능하지만 RANDOM_PORT 추천
6. @MockBean
- ApplicatonContext에 들어있는 Bean을 Mock으로 만든 객체로 교체함
- 모든 @Test마다 리셋되기 때문에 관리 필요없음
- 서비스단까지 가지 않고, 컨트롤러만 테스트하고 싶은 경우
@MockBean을 이용해서 끊을 수 있음 - @SpringBootTest (통합 테스트)와 슬라이스 테스트 모두에서 사용 가능
@RunWith(SpringRunner.class)
@SpringBootTest(webEnvironment = SpringBootTest.WebEnvironment.RANDOM_PORT)
public class SampleControllerTest {

   @Autowired
   TestRestTemplate testRestTemplate;

   @MockBean
   SampleService mockSampleService;

   @Test
   public void hello() throws Exception {
      when(mockSampleService.getName()).thenReturn("kvp");

      String result = testRestTemplate.getForObject("/hello", String.class);
      assertThat(result).isEqualTo("hello kvp");
   }
}
7. WebTestClient
- Spring5에서 SpringMVC WebFlux 쪽에 추가된 Rest Client 중 하나
- WebTestClient는 Asynchronous(비동기)
요청 하나를 보내고 기다리는 것이 아니라, 응답이 오면 콜백을 실행할 수 있음
기존의 Rest Client는 Synchronous(동기) : 요청 하나 보내고 끝날 때까지 기다렸다가 다음 요청 보낼 수 있음 - 의존성 추가해줘야 함 (추가 안 할 경우 NoSuchBeanDefinitionException 발생)
<dependency>
    <groupId>org.springframework.boot</groupId>
    <artifactId>spring-boot-starter-webflux</artifactId>
</dependency>
@RunWith(SpringRunner.class)
@SpringBootTest(webEnvironment = SpringBootTest.WebEnvironment.RANDOM_PORT)
public class SampleControllerTest {

   @Autowired
   WebTestClient webTestClient;

   @MockBean
   SampleService mockSampleService;

   @Test
   public void hello() throws Exception {
      when(mockSampleService.getName()).thenReturn("kvp");

      webTestClient.get().uri("/hello").exchange()
         .expectStatus().isOk()
         .expectBody(String.class).isEqualTo("hello kvp");
   }
}
8. 슬라이스 테스트
: 수많은 Bean들이 등록되는 것이 싫고, Test할 Bean만 등록하고 싶은 경우
@JsonTest, @WebMvcTest, @WebFluxTest, @DataJpaTest을 이용하면 레이어 별로 잘라서 적용이 됨
- @JsonTest
- @WebMvcTest
- 컨트롤러 하나만 테스트
- 일반적인 @Component들은 Bean으로 등록되지 않고 Web과 관련된
@Controller, @ControllerAdvice, @JsonComponent, Converter, GenericConverter, Filter,
WebMvcConfigurer, HandlerMethodArgumentResolver만 Bean으로 등록함
- @Service, @Repository는 Bean으로 등록되지 않음
@WebMvcTest(SampleController.class)
- @WebFluxTest
- @DataJpaTest
- @Repository들만 등록이 됨
Core Features
Spring Boot lets you externalize your configuration so that you can work with the same application code in different environments. You can use a variety of external configuration sources, include Java properties files, YAML files, environment variables, an
docs.spring.io
9. Test Util
- OutputCaptureRule
- junit에 있는 Rule을 확장해서 만든 것
- OutputCaputreRule 객체를 public으로 만들어줘야 함
- log와, Console에 찍히는 값들을 Test Code로 작성할 수 있음 - TestPropertyValues
- TestRestTemplate
- ConfigFileApplicationContextInitializer
@RunWith(SpringRunner.class)
@WebMvcTest(SampleController.class)
public class SampleControllerTest {

   @Rule
   public OutputCaptureRule outputCaptureRule = new OutputCaptureRule();

   @Autowired
   MockMvc mockMvc;

   @MockBean
   SampleService mockSampleService;

   @Test
   public void hello() throws Exception {
      when(mockSampleService.getName()).thenReturn("kvp");

      mockMvc.perform(get("/hello"))
         .andExpect(content().string("hello kvp"))
         .andDo(print());

      assertThat(outputCaptureRule.toString())
         .contains("hhlin")
         .contains("skip");
   }
}
# SampleController
@RestController
public class SampleController {

	Logger logger = LoggerFactory.getLogger(SampleController.class);

	@Autowired
	private SampleService sampleService;

	@GetMapping("/hello")
	public String hello() {
		logger.info("hhlin");
		System.out.println("skip");
		return "hello " + sampleService.getName();
	}
}
# SampleService
@Service
public class SampleService {

   public String getName() {
      return "hhlin";
   }
}
https://www.inflearn.com/course/%EC%8A%A4%ED%94%84%EB%A7%81%EB%B6%80%ED%8A%B8/dashboard
스프링 부트 개념과 활용 - 인프런 | 강의
스프링 부트의 원리 및 여러 기능을 코딩을 통해 쉽게 이해하고 보다 적극적으로 사용할 수 있는 방법을 학습합니다., - 강의 소개 | 인프런...
www.inflearn.com